There are two ways you can dodge or burn your image in Photoshop non-destructively; using the layer mask method, or using the overlay blend mode. If you use the dodge and burn tools, you will not be able to reverse the changes to your image. The methods in this article enable you to reverse the dodge or burn effect on your image.
How to dodge in Photoshop using layer mask
To dodge in Photoshop using the layer mask method:
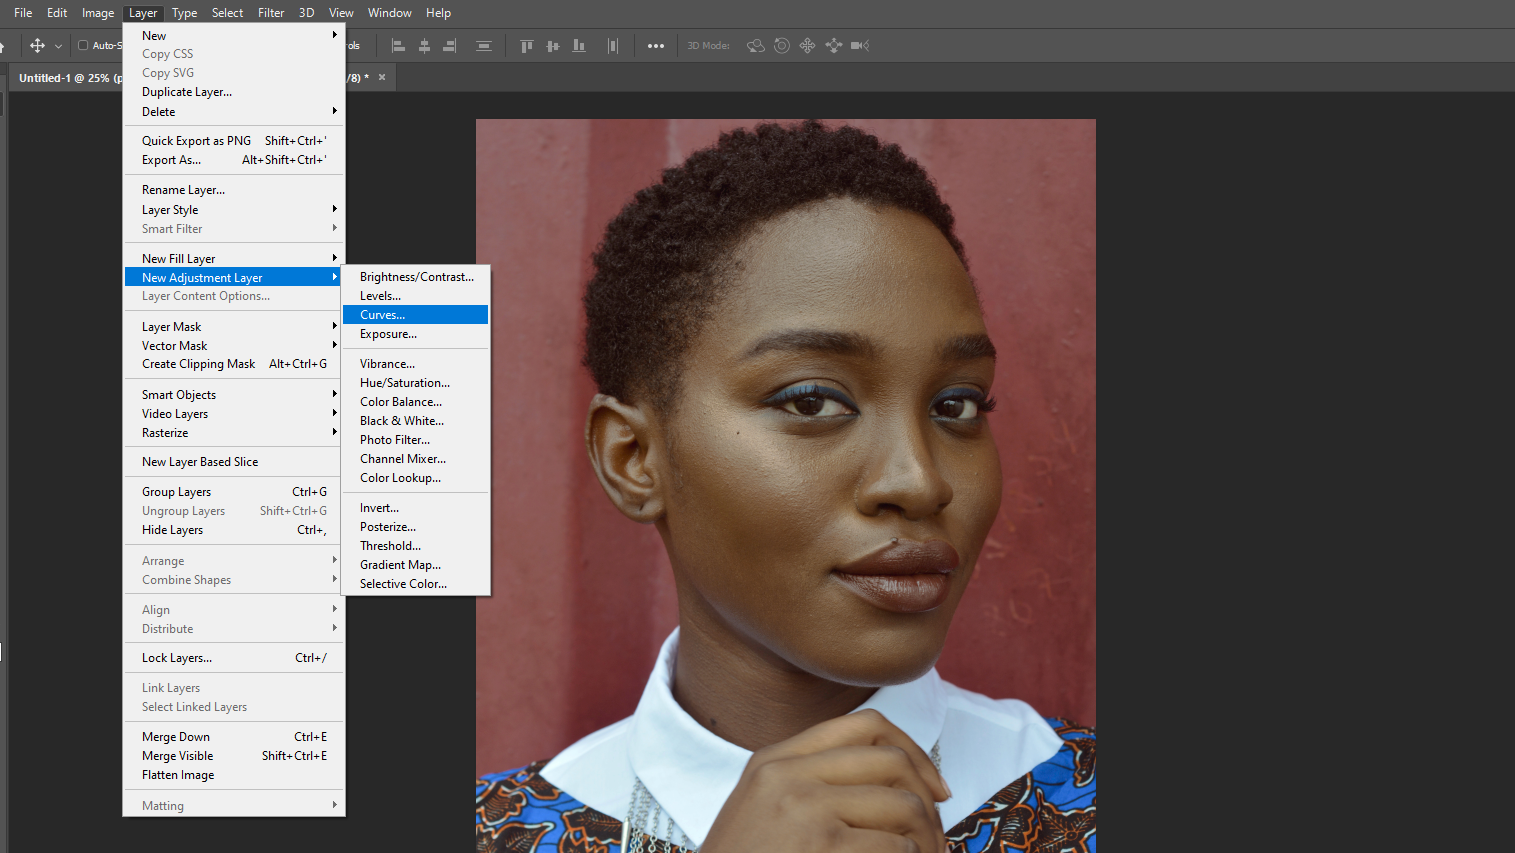
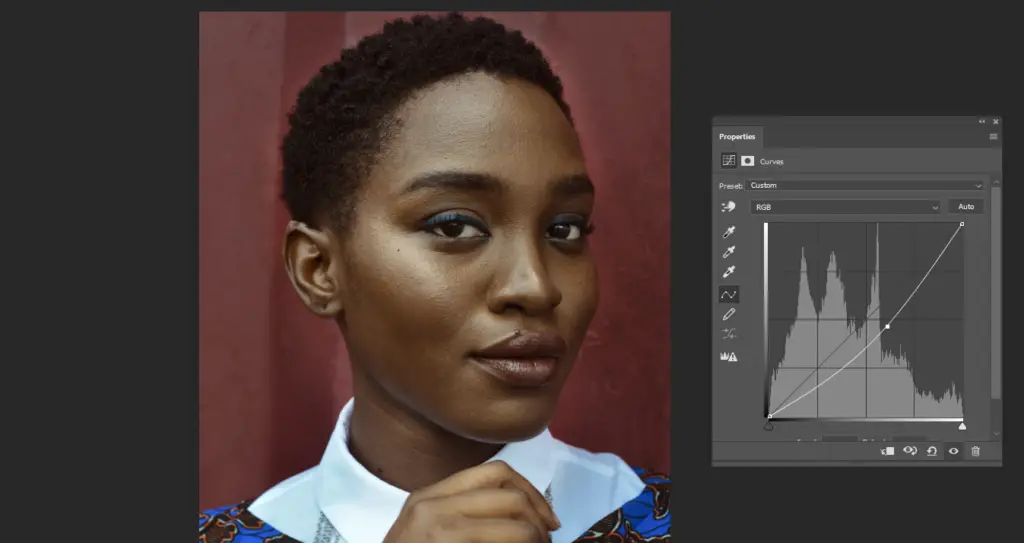
- Open your image in Adobe Photoshop. Go to Layer> New adjustment layer> Curves. You may also create the curves adjustment layer by clicking the adjustments icon at the bottom of your layers panel. Click on the line in the curves panel and drag it up to lighten the image slightly. Go with your artistic eye and judge how much you want to brighten parts of the image.

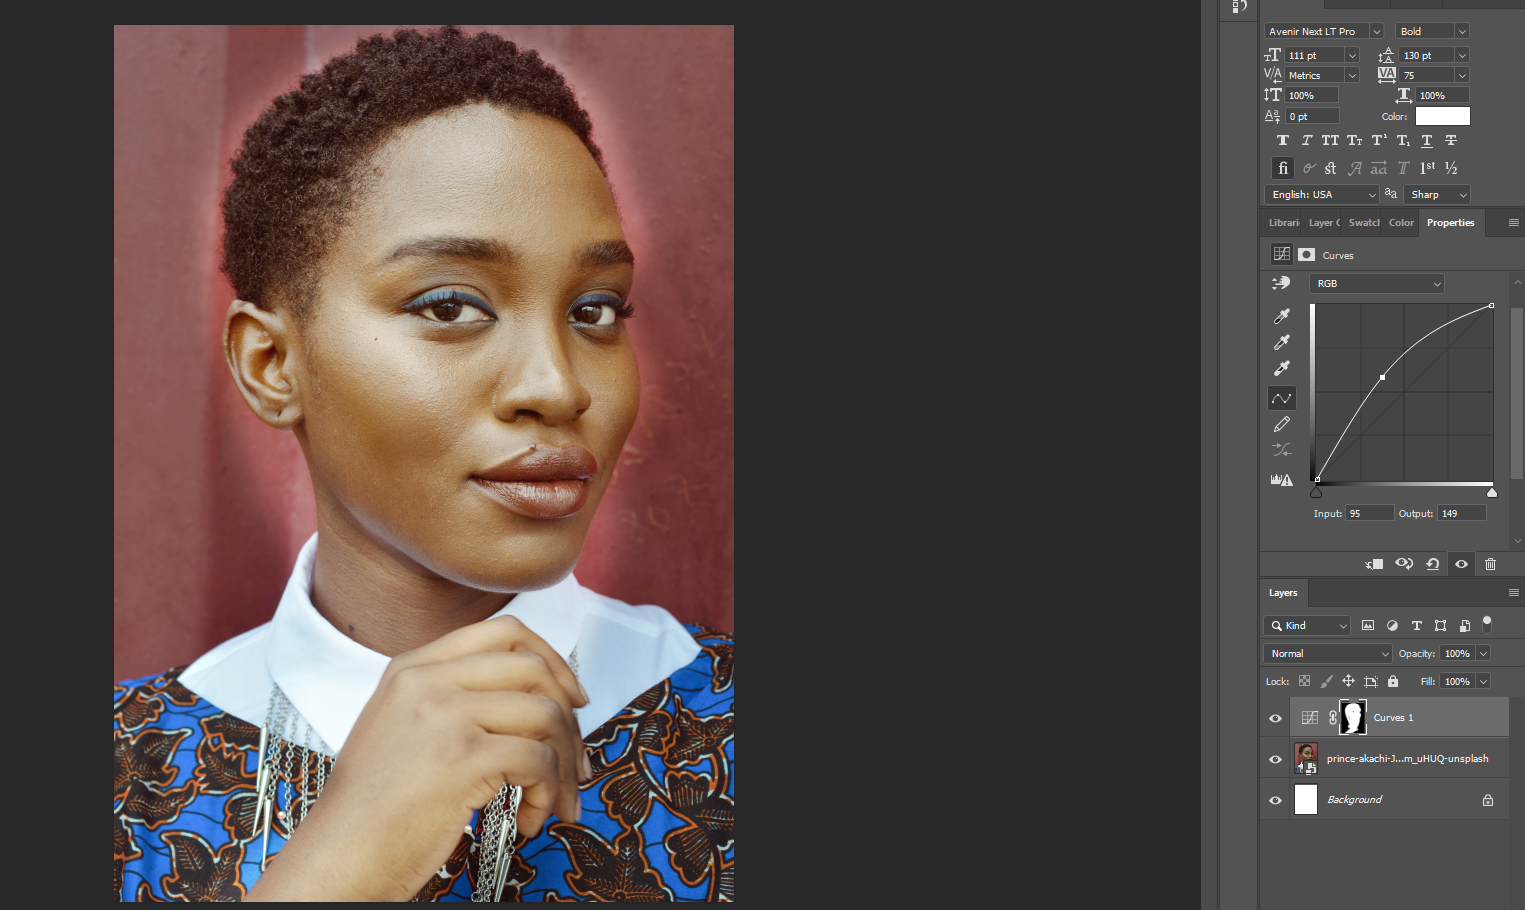
2. Now click on the layer mask of the curves adjustment layer and press Ctrl+I on PC or Cmd+I on a Mac on your keyboard. This will invert the layer mask to black. The reason for this is so that the dodge effect or the lightning will only be confined to the white parts of the layer mask that we will paint on in the next step.
3. Select your brush tool and right-click on your image to get the brush options. select a round soft brush. Adjust the size to what’s comfortable for you. My brush is 354px and my image is in A4 size. The soft brush will allow for a smooth dodge effect rather than having too much contrast between the light and the shadows.
4. Select pure white in your color picker. Then while still on your layer mask, paint the area of your image that you want to dodge/brighten. You can reduce the opacity of your brush if you want a softer dodge. You will still be able to adjust the brightness with the curve adjustment layer so don’t worry about perfectly lightening the image with your brush tool.
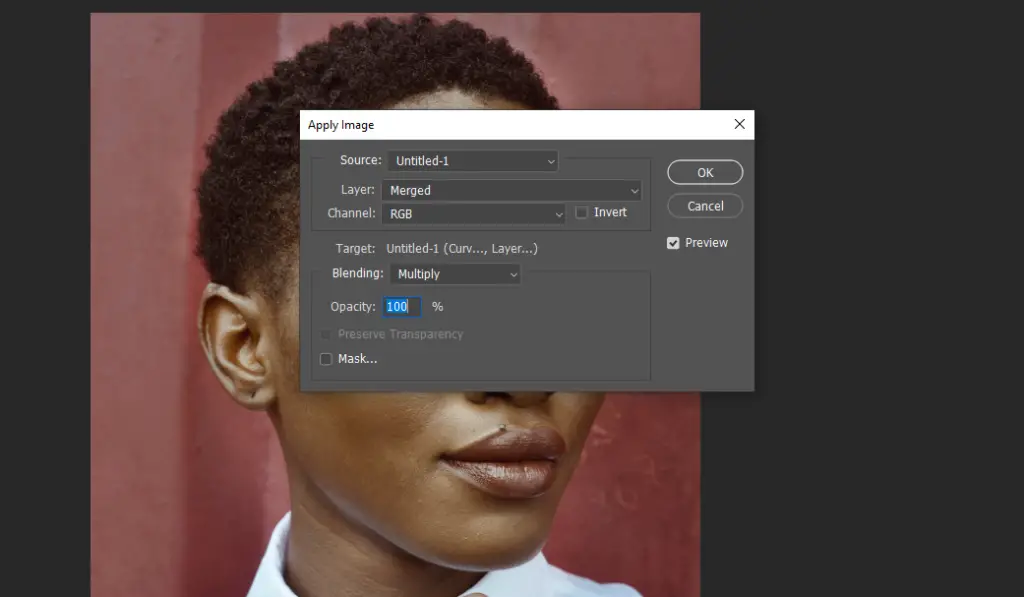
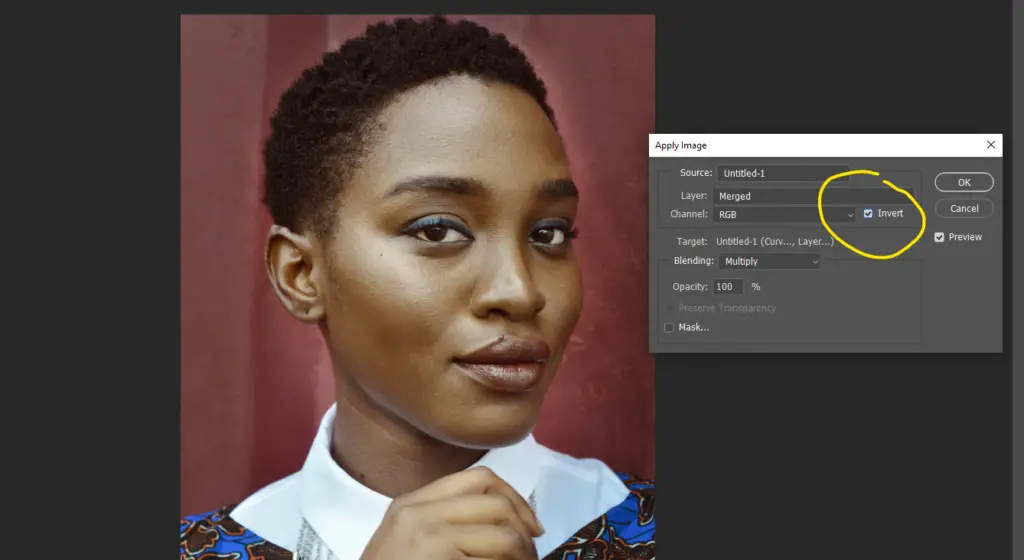
5. Once you’ve brushed on all the areas you want to brighten, you need to blend the effect so the lighting on your image looks more natural. Go to image>Apply Image. In the pop-up box, make sure the settings are Merged, RGB and blending is set to multiply as shown below. Also make sure the invert setting is unchecked.
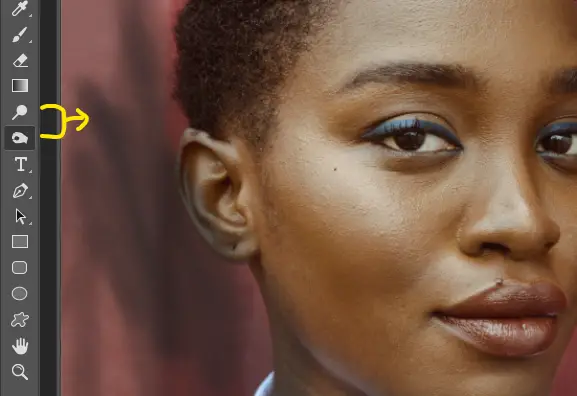
6. You can Alt+click on PC or Opt+click on Mac on the layer mask to see the area the dodge effect applies to.
How to burn in Photoshop using layer mask
Now we’ll darken the parts of the image that we need to.
- Just like the process of dodging, create a new adjustment layer with curves. Layer> New adjustment layer> Curves. This time, pull down the curve to make the image darker until you’re satisfied with the darkness you want to achieve.
2. Invert the layer mask. Ctrl+I on PC or Cmd+I on a Mac. The layer mask should turn black.
3. Select your brush tool, again with a soft brush. Pick white in your color picker.
4. On your layer mask, Brush on the areas of your image you want to darken/burn. I brush the background’s outer edges.
5. Go to apply> Image. This time in the settings, check “Invert” which will apply the effect in the darker areas of your image.

6. You can adjust the curves now by clicking the curve layer and adjusting in the properties window to achieve a good balance between the dodge and burn.
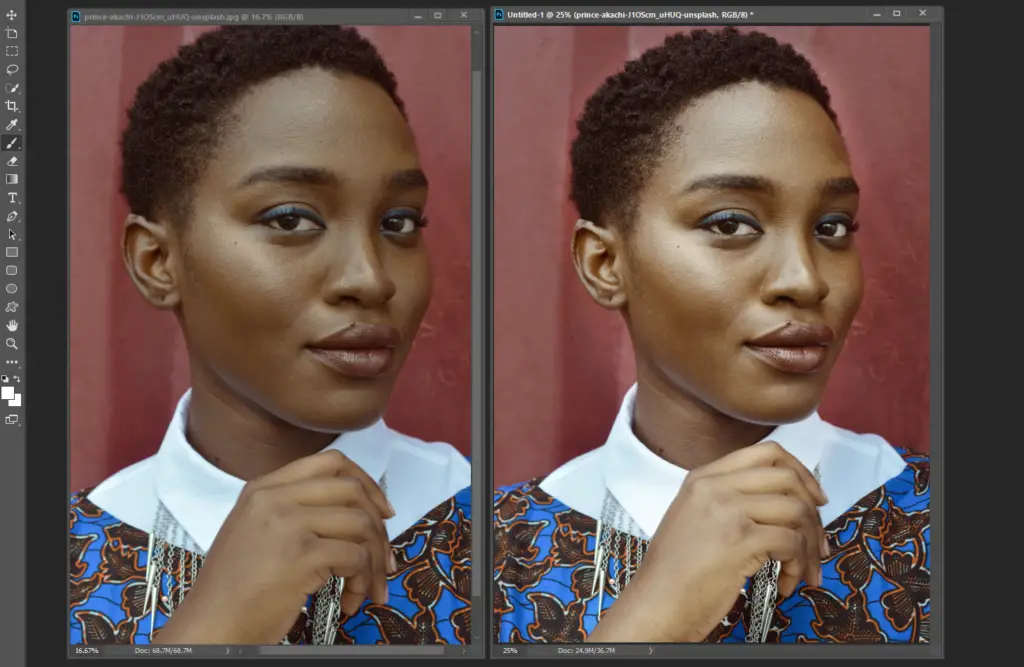
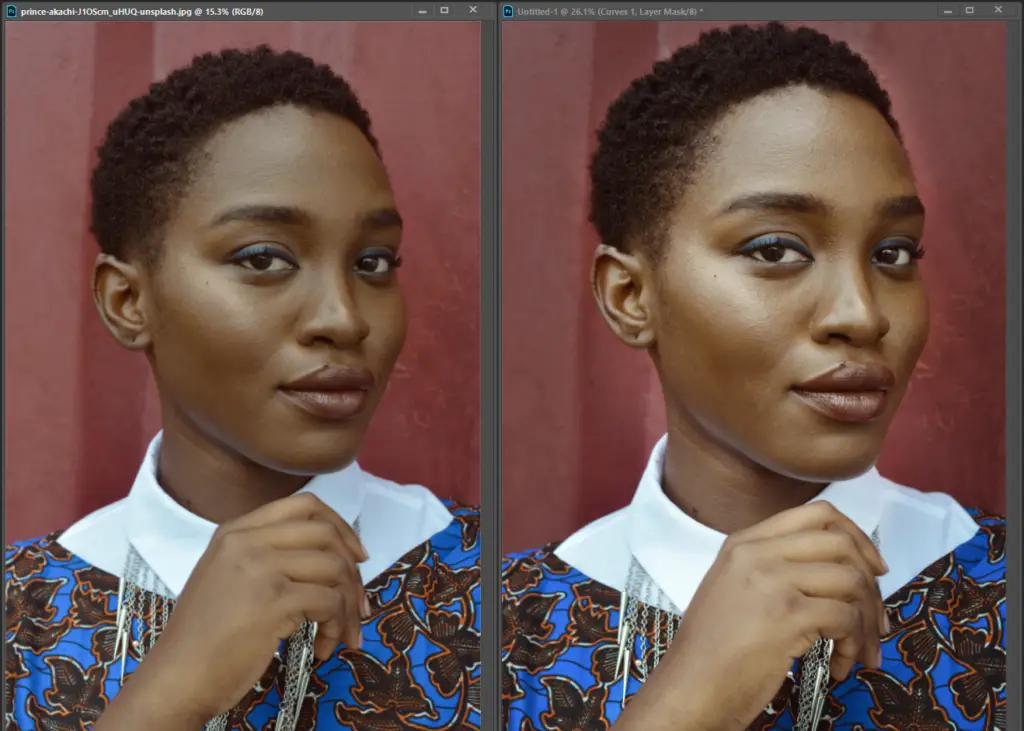
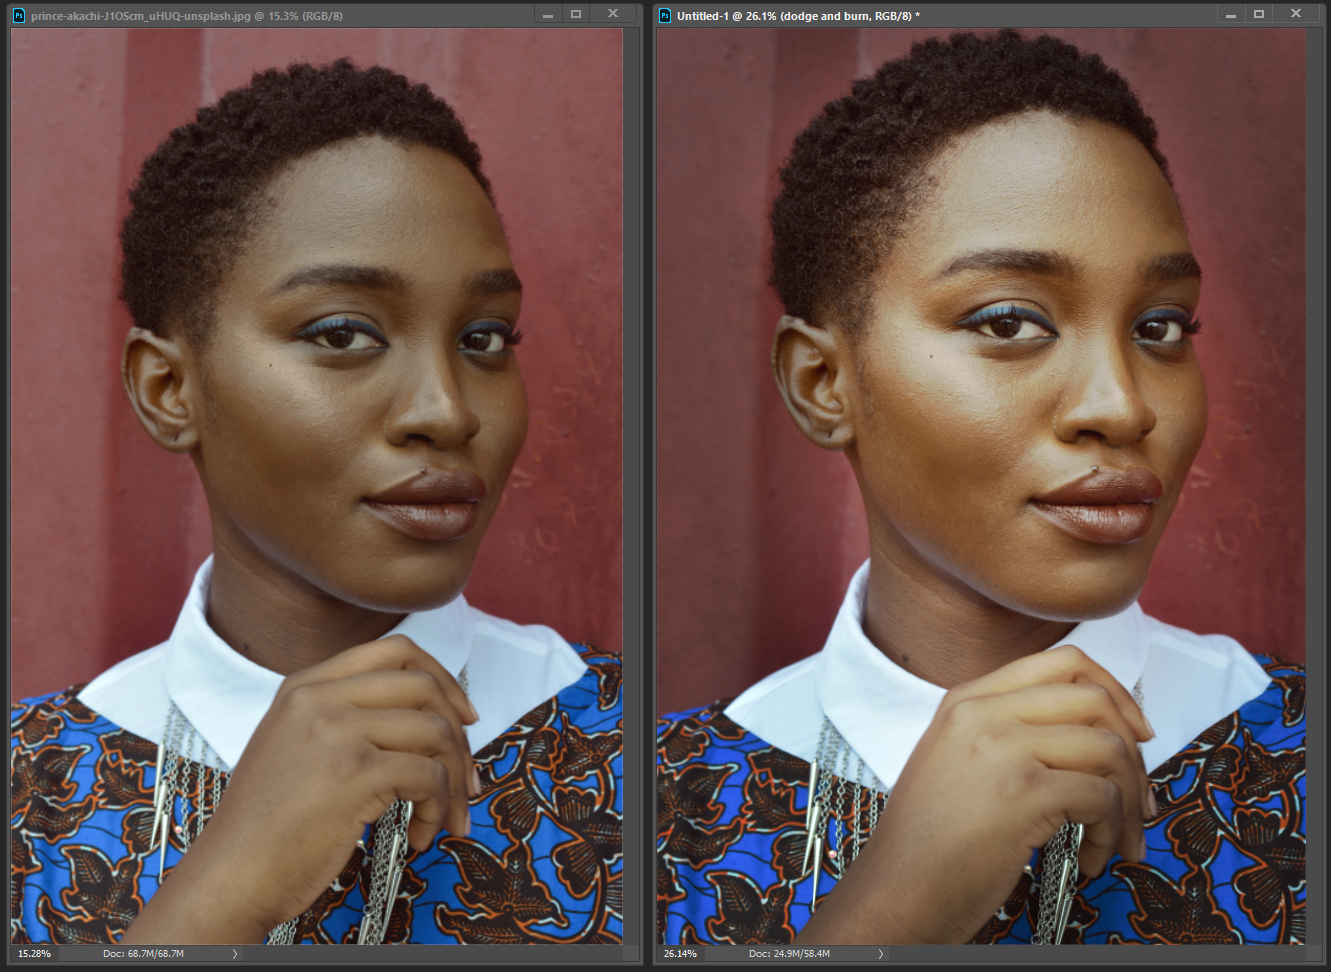
Here’s the before (left) and after dodge and burn (right). The image now looks bolder and has better contrast and focus. The great thing with this technique is you aren’t lightening the skin, but actually changing the lighting conditions after. This dodge and burn technique also works well with landscapes. Also, you can probably do better with the brush when dodging around the edges of the face than I’ve done.
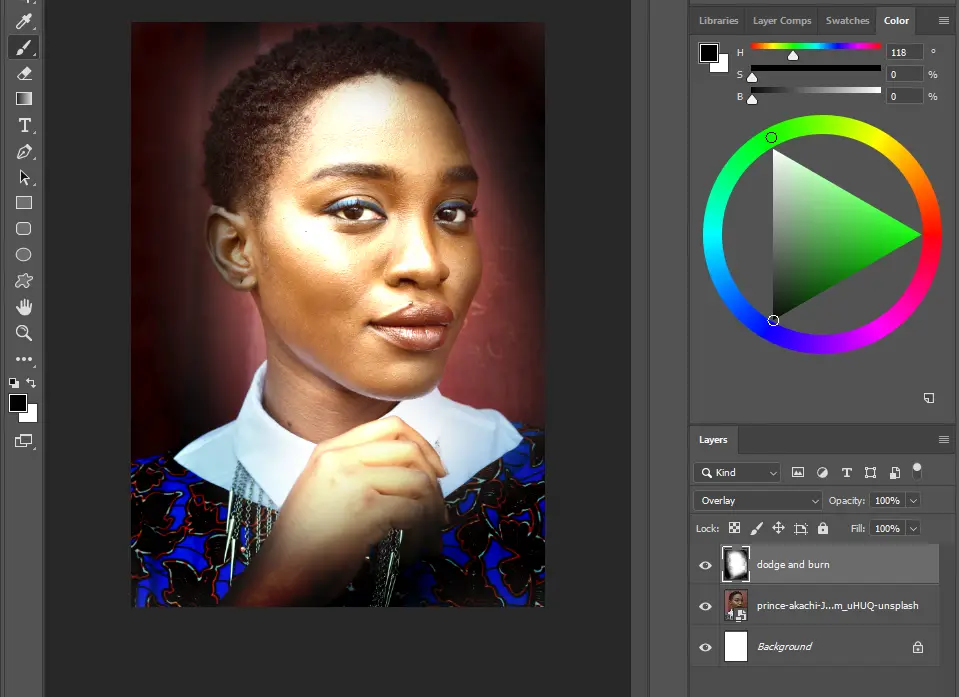
How to dodge and burn in Photoshop using overlay
In this method, we will use the overlay blend mode to dodge and burn. A layer with the overlay blend mode brightens and darkens areas with less than or greater than 50% gray (50:50 black and white). Painting with black and white on this layer achieves the dodge and burn effect you require.
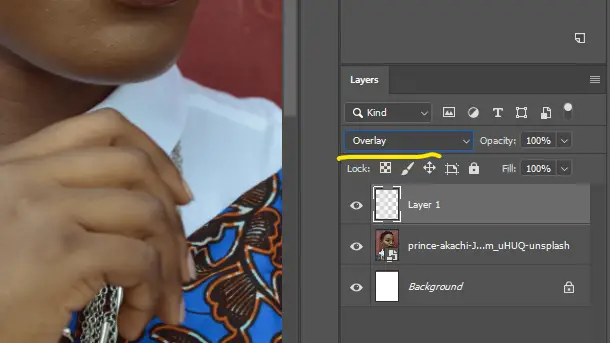
- Create a new layer above your image.
2. Change the blending mode of your layer from Normal to Overlay. You can name this layer “Dodge and Burn” in case you’re working with a lot of layers and don’t want to lose it.
3. Select your brush tool and pick a soft brush. You can reduce the opacity for a softer dodge effect. Select white in your color picker #ffffff. Paint the areas you want to brighten (dodge) with white. Once you’re done, pick black in your color picker and paint the areas you want to darken (burn) #000000. The image may look harsh at first.
4. To reduce the harshness, select your dodge and burn layer and reduce the fill in the layer options as shown.
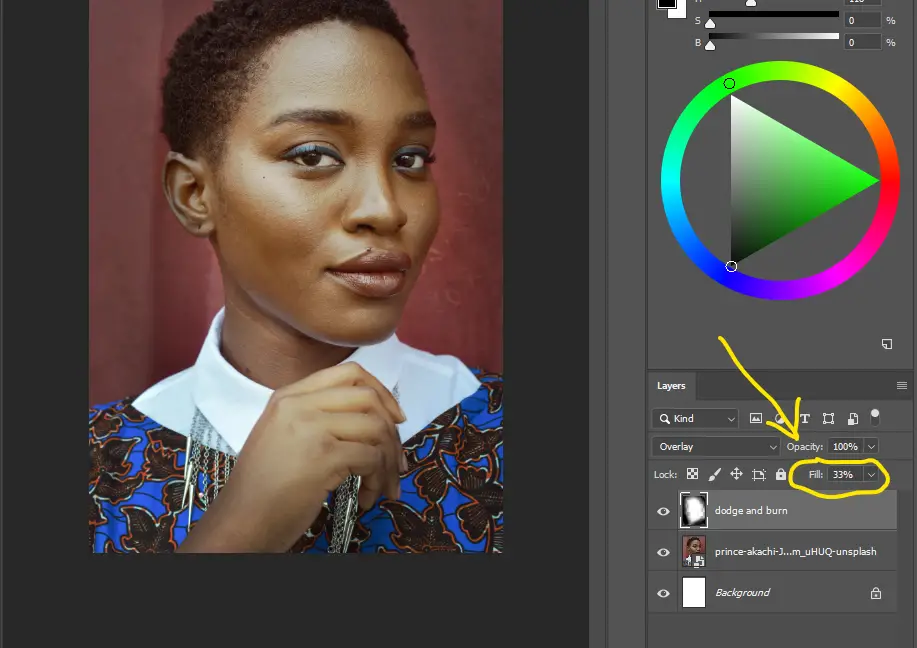
Here’s the before and after with the overlay method. You can view your white and black areas by switching the layer mode from Overlay to Normal. Use your brush tool with white or black to edit the dodge and burn areas.
What is dodging and burning
Dodging refers to lightening parts of an image while burning is darkening parts of an image. The term comes from the old method of a photographer dodging and burning parts of a photograph when processing in a darkroom. The photographer would reduce the exposure time to lighten the photograph (dodge) or increase the exposure time to darken parts of the image (burn).
In photoshop, graphic designers and photographers need to dodge and burn to create the same effect of lightening and darkening. This may be to increase the focus on an object or to reveal hidden details.
How NOT to dodge and burn
You’re probably wondering, why not use the handy dodge and burn tool available in the tools panel on photoshop? The dodge and burn brushes can only be used directly on your rasterized image. This means any effect you apply is “burned” or permanently fixed onto your image and you will not be able to adjust the brightness and dodge and burn effects. This is known as a destructive effect.
The methods I’ve shown you above are non-destructive since you can readjust or toggle off the effect layers. In the first method, you can adjust the curve, and in the second method, you can repaint the overlay blend layer, change its opacity or toggle off the layer visibility to get rid of the effect. Your original image layer will still be unaffected.
Image used for the demonstration was obtained from unsplash.
You may also want to learn What Does Expand Do In Illustrator?
1 thought on “How to dodge and burn in Photoshop the RIGHT WAY”
Comments are closed.