Color wash effects make your photos look like they’ve been watered down or painted with watercolors. It’s a great way to add interest to your images. You can even print There are a few ways to achieve the color wash effect, including actually painting with watercolors, but if you don’t have the watercolor skills or you just don’t have the time or materials, you can do it digitally in photoshop. In this article, I’ll show you the best method to achieve a color wash effect with simple steps using filters, brushes and textures.
How to add color wash effect in Photoshop
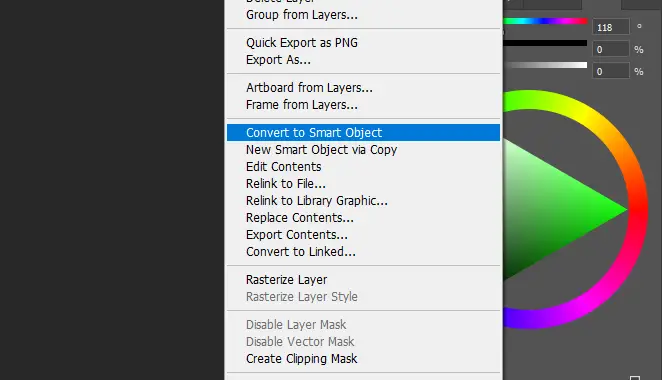
1. Open your image in photoshop. Use your own photo or you can download the image I’ve used via this link. Duplicate the background layer by pressing Ctrl+J for PC or Cmd+J on Mac on your keyboard. Right-click the new layer and select convert to smart object. You can also create a new document and place the photo. This will allow us to edit the filters we add to the image rather than permanently changing the photo.
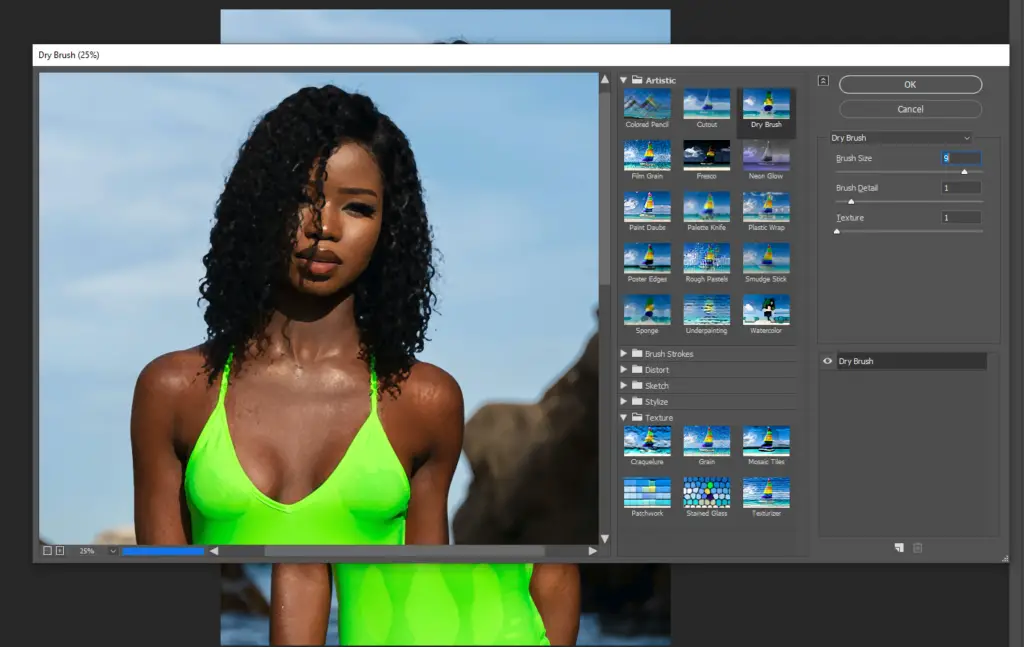
2. Go to Filter>Filter Gallery… In Filter gallery window, select dry brush under the artistic drop down. Change the brush size to 9, brush detail to 1, and texture to 1. Then click ok.
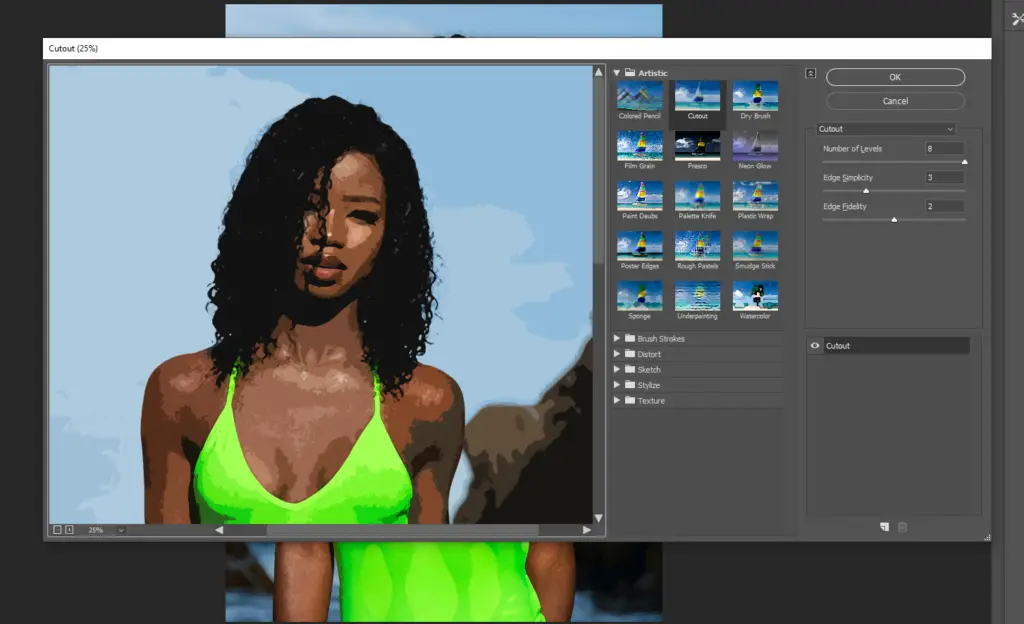
3. Go to Filter>Filter Gallery again. This time, select Cutout. Change the settings to Number of levels 8, Edge simplicity 3, Edge fidelity 2, then click ok.
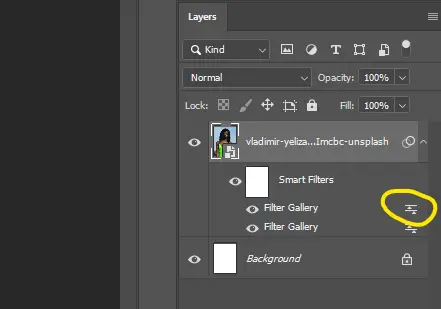
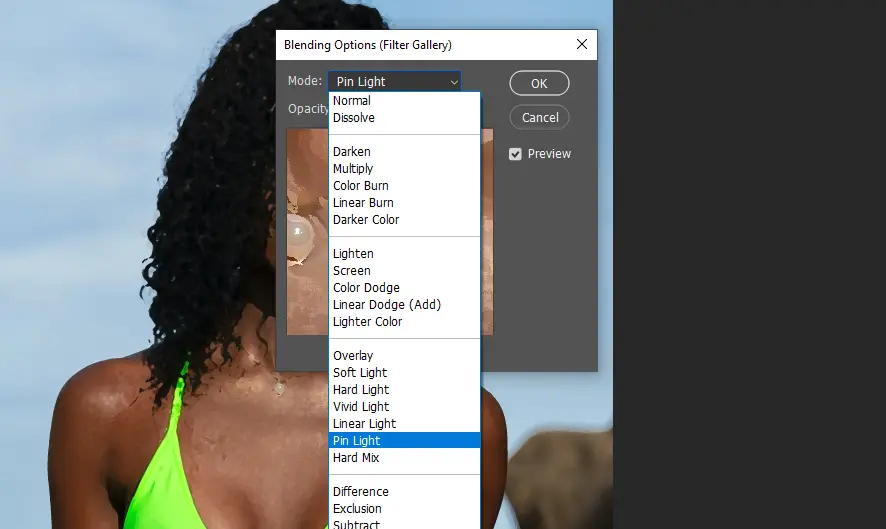
4. Under your image layer, you’ll see the smart filters. Double click the options icon for your cutout filter as shown. The blending options window will pop up. Change the blending mode to Pin Light. Then click ok.
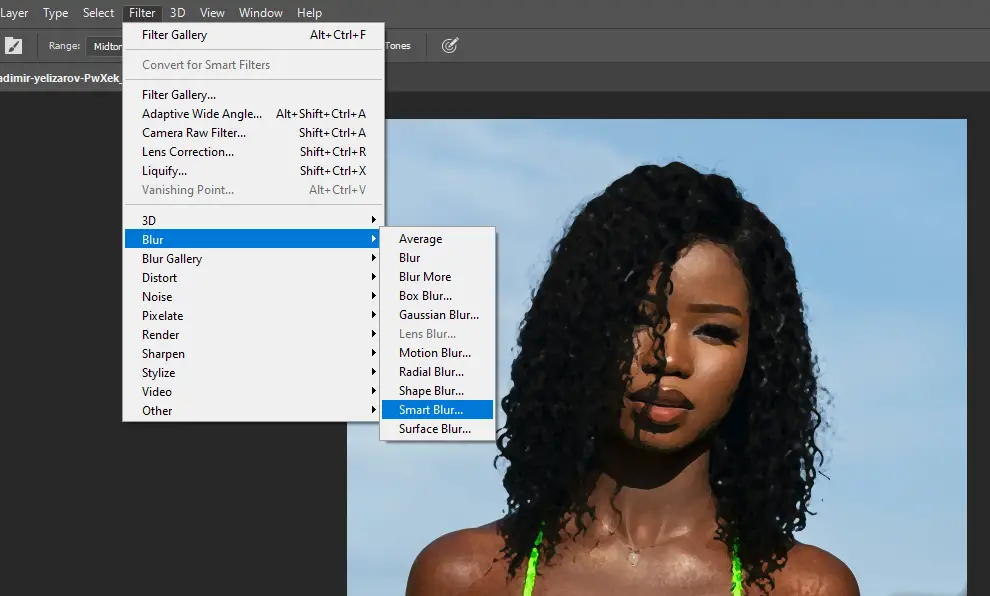
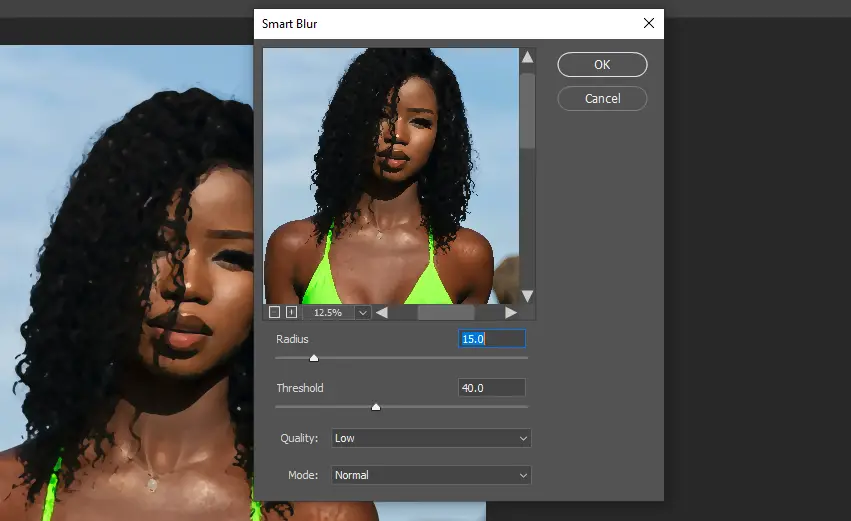
5. Go to Filter>Blur>Smart blur… In the smart blur settings, change the radius to 15 and threshold 40 and click ok.
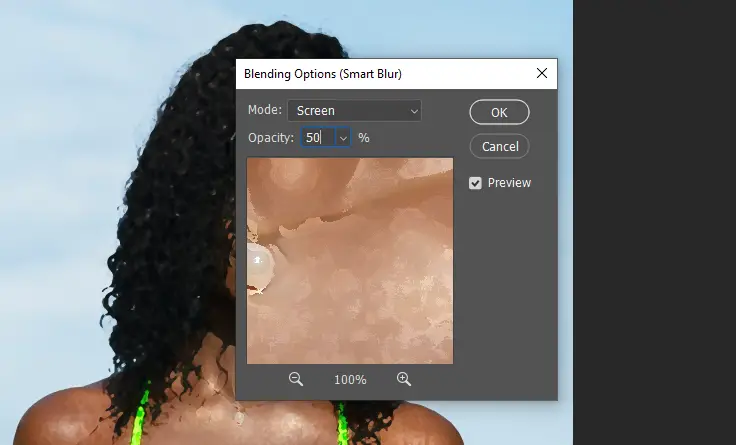
6. Click the options for your smart blur filter. In the blending options window, change the blending mode to screen and reduce the opacity to 50. Click ok. At this stage, the image colors should start to look a bit washed.
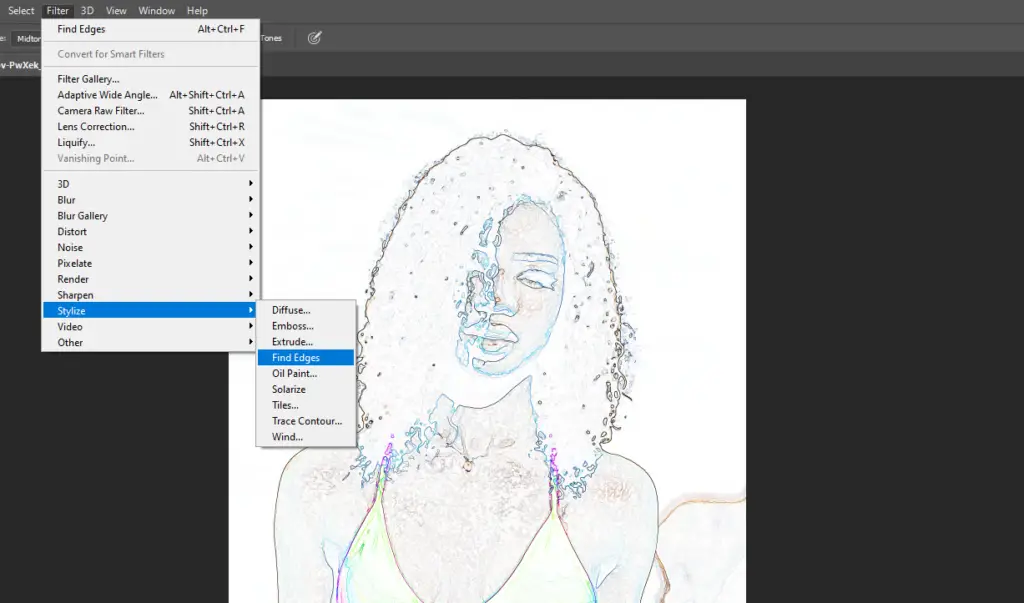
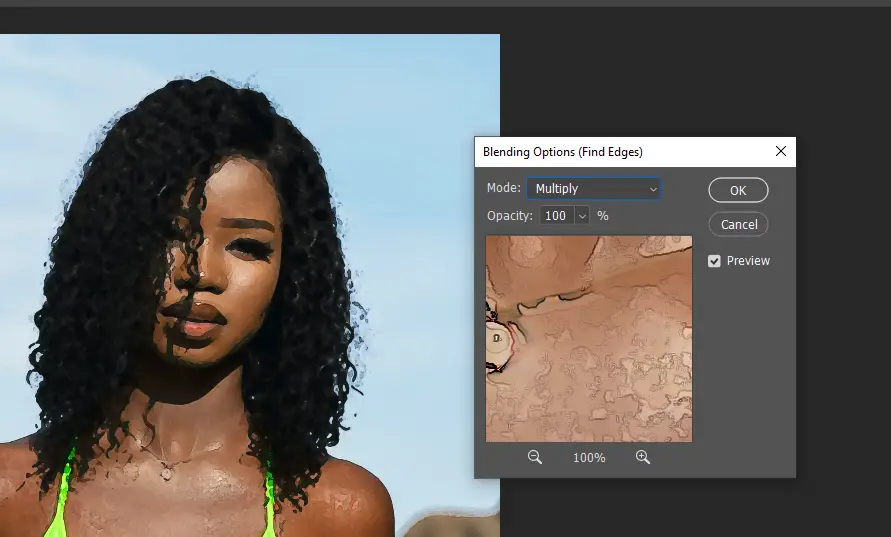
7. Go to Filter>Stylize>Find Edges. Click the find edges filter option icon, and change the blending mode to Multiply. Click ok.
8. Place your watercolor texture onto photoshop by going to File>Place or drag it into the document window. You can download your own or get Background photo created by kues1 – www.freepik.com” target=”_blank” aria-label=”the one I’m using (opens in a new tab)” rel=”noreferrer noopener” class=”rank-math-link”>the one I’m using
. The texture layer should be above the image layer. Change the blending mode of the texture layer to multiply.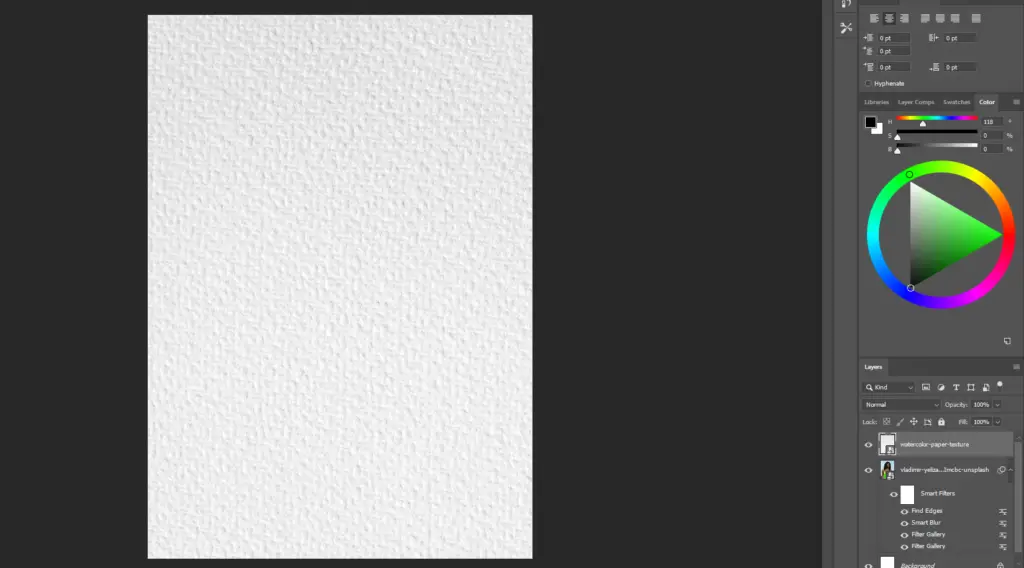
9. Select your image layer and add a layer mask as shown in the image below.
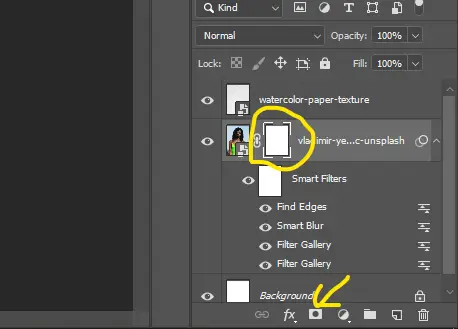
10. Invert the layer to black by pressing Ctrl+I or Cmd+I on your keyboard. This will allow us to reveal the parts of the image we want with the watercolor brushes to create the color wash effect.
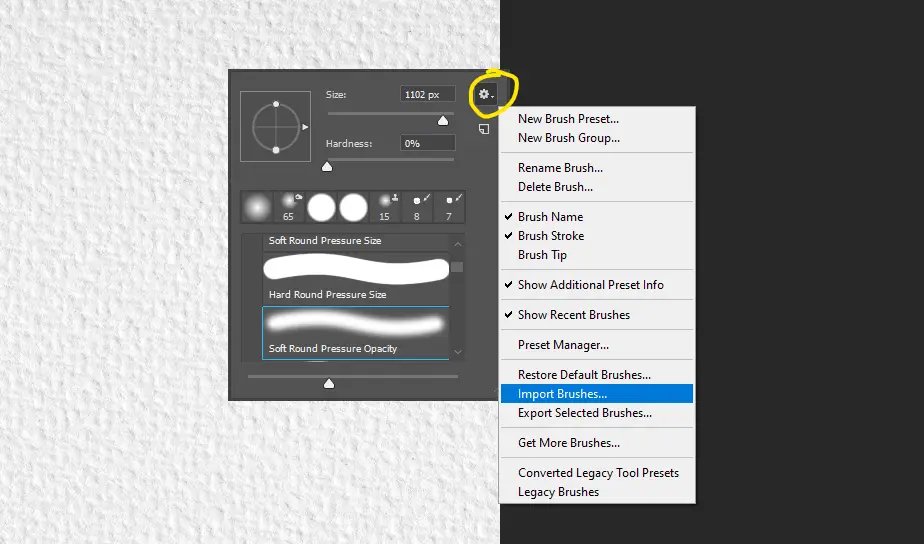
11. Select your brush tool. Right-click on the document. The brushes options should pop up. Click the settings icon and select import brushes. If you already have watercolor brushes you can skip this. If you don’t, download the ones I used from brusheezy and load them onto photoshop.
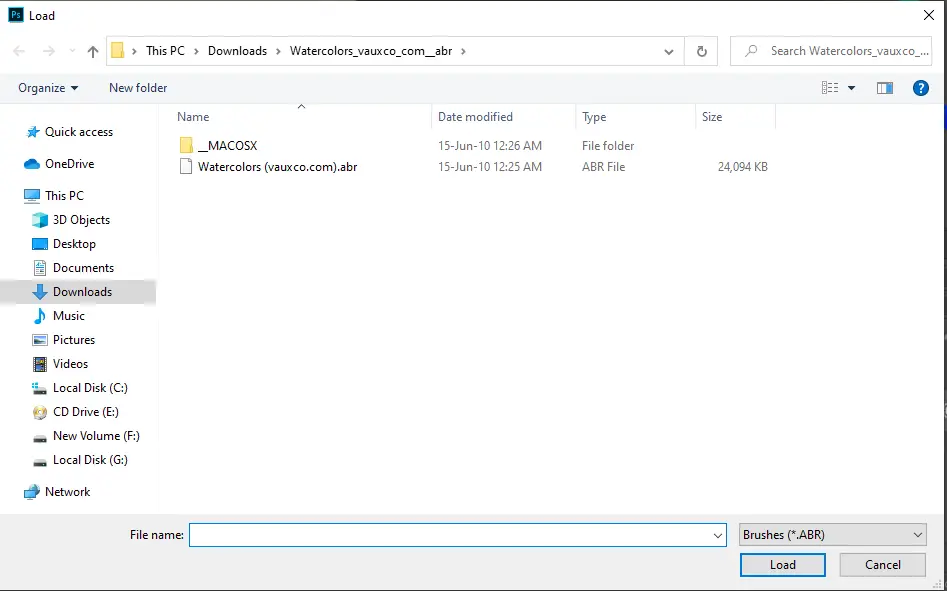
12. Select the layer mask. Pick a watercolor brush from your panel and change the size to the one you’re comfortable with depending on your image size. Select white in your color picker I.e #ffffff
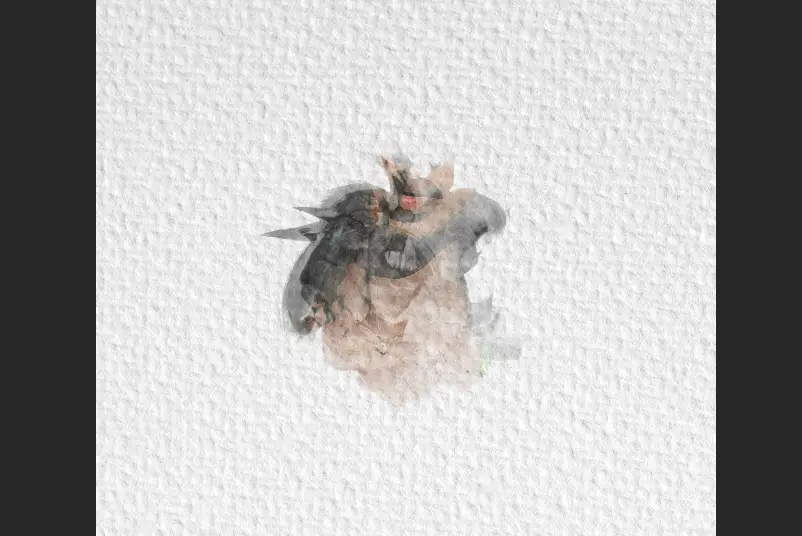
13. For this step, brush onto your image layer mask with single clicks. This will reveal parts of your image with the watercolor color wash effect. You can switch between brushes to give it a more natural effect.
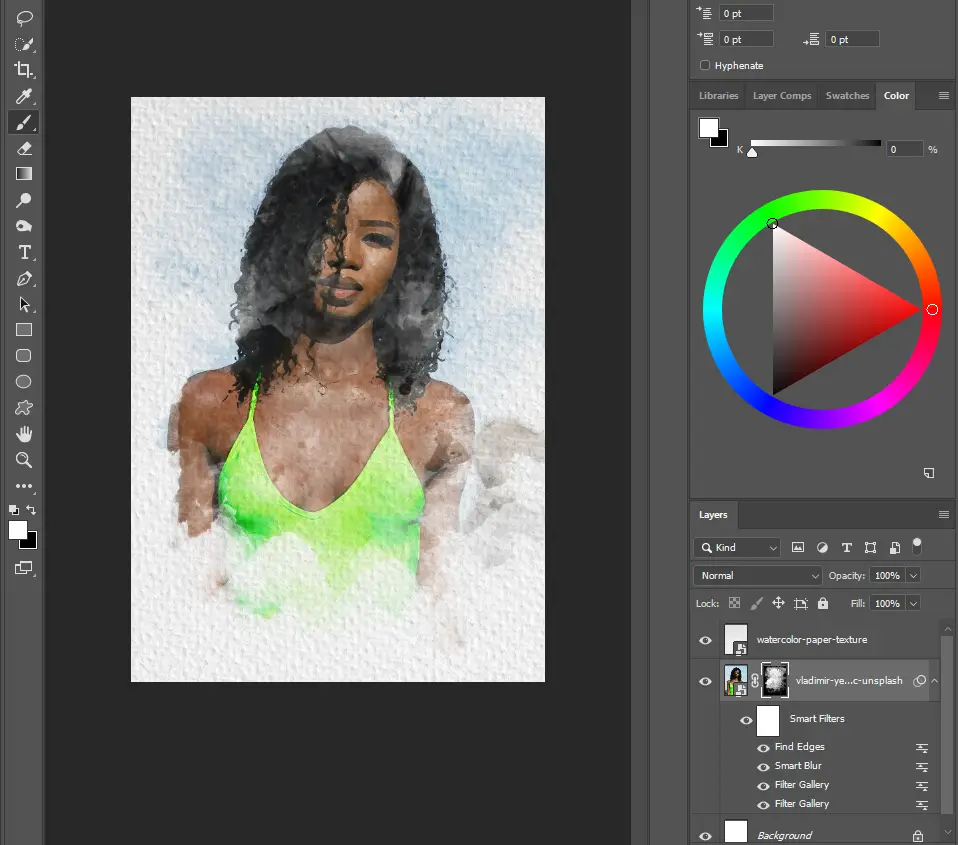
14. If you want to increase or reduce the contrast in the colors, create a new adjustment layer with curves. Drag the curve up or down to achieve your desired effect. Apply the adjustment layer below your paper texture layer so it doesn’t affect it.
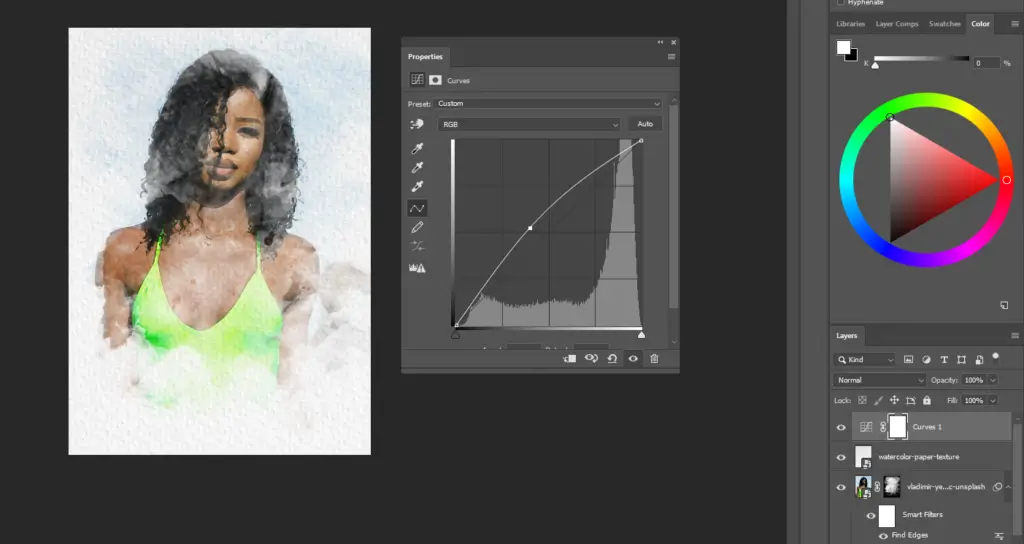
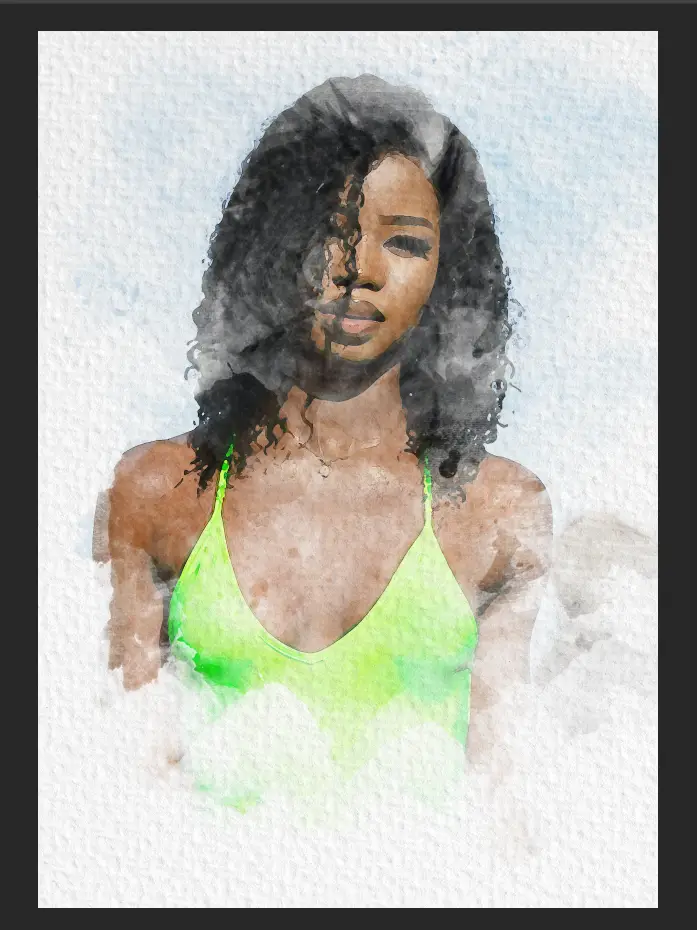
15. And that’s pretty much it. If you need to tweak the filter settings, you can do so by double-clicking on the filters under your image layer. Use your creativity to find the best settings for your photo.
If you found this article helpful, share it with friends and subscribe to our email listing and be the first to receive graphic design tips and resources straight to your inbox.
Model image from Unsplash.
You may also want to learn What Does Expand Do In Illustrator?

1 thought on “How to add color wash effect in Photoshop quick and Easy”
Comments are closed.