The Expand function in Illustrator transforms brush strokes, text and patterns into vector shapes with editable outlines and anchor points. When you expand a brush stroke, text or pattern, you are no longer able to edit their effects in their respective tool options.
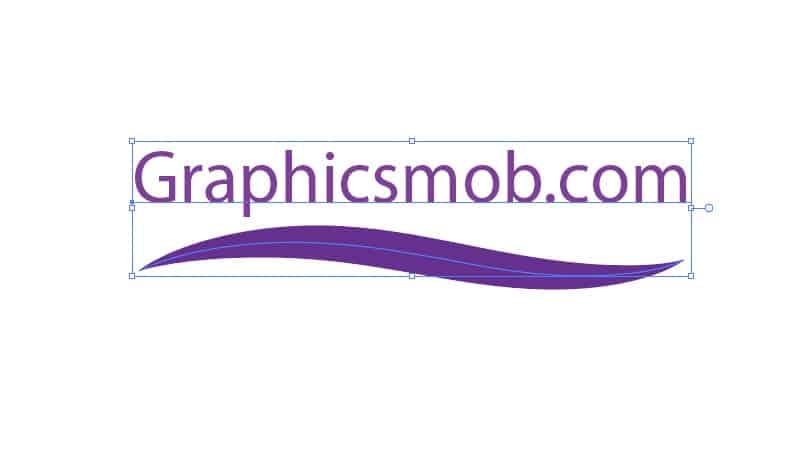

For instance, if you edit a brush stroke, you can’t change the stroke width, the style, or the original “path of flow” because it is now a vector shape. You can however change the path around the shape using it’s anchor points and manipulate the shape with other tools like shape-builder, warp, pathfinder etc.
When you expand text, you can’t change the font, kerning, leading, paragraph spacing in the text options. The letters that formed the text are now broken down into shapes grouped together (can be ungrouped) with a path around each letter with anchor points. You can edit the fill and stroke/outline as you would with any shape.
An expanded pattern is also not editable as a contiguous effect, but the individual repeating objects (motifs) that form the pattern are expanded into individual vector shapes whose fill and stroke you can edit and transform as you would with any other vector.
The best monitors for reducing eye-strain: for work, movies and gaming
Why and when to use Expand in Illustrator
We expand objects in illustrator when we want to edit, transform or save them as vector shapes that have an outline, fill, gradient and, or other shape effects. Text is expanded so that when the document is saved and shared for print or viewing and editing, the text will be readable whether the other person’s computer or printer has the font.
If the text is shared as editable text, and the recipient does not have the specified font, the text will not display and the document will show a missing font error when opened.
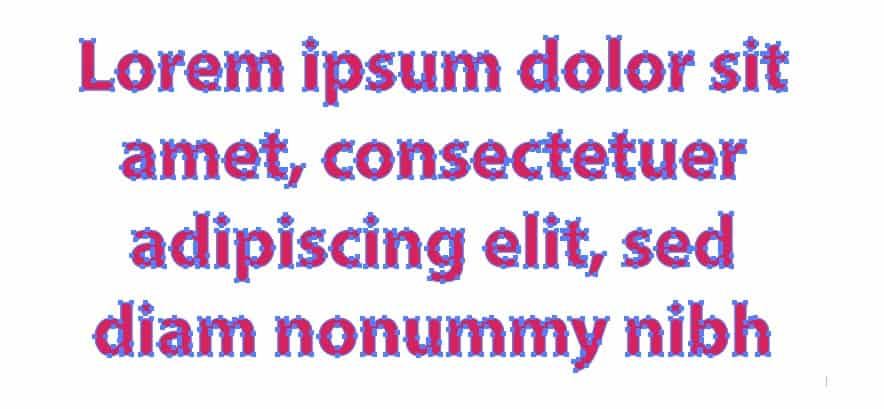
Another advantage of expanding the font, is the letter spacing, size and other attributes will remain proportion when the text is transformed as a group, copied into other documents or printed in different sizes. Since it is a vector, there is no risk of losing resolution with enlargement for printing or screen display.
The downside of expanding the text is that you and the file recipient will not have the ability to edit the text, for instance when there are spelling mistakes. You can undo the expand with the undo button (ctrl+z) in Illustrator, but you’d also have to undo every step or effect you made since expansion. And if you had done it multiple steps back outside your undo limit, you can’t reverse the function.
Your only option would be to rewrite the text again if you remember the font with the text effects and inputs you had applied. If your recipients have the font you are using installed on their computer, then you may not need to expand the text.
Expanding brush strokes and patterns in illustrator is done to break the link to their respective effects, and enable you to transform them proportionately and manipulate them as individual vector shapes. Like text, you can only undo the expansion with the undo option (ctrl+z) but you’ll have to undo every step you’ve made since the expansion.
How to enable expand appearance in Adobe Illustrator
To enable expand appearance in Adobe Illustrator:
- Select the object (text, stroke etc) that you want to expand using the selection tool (V).
- Go to Object>Expand or Object>Expand Appearance if it’s a brush stroke.
- The Expand dialog box will open. If you are expanding text, “fill” and object will be checked. Click ok.
- For shapes with stroke widths, you’ll get “fill” and the option to expand the “stroke” as well into it’s own shape. Uncheck “stroke” if you don’t wish to expand the stroke. Click ok.
Your object is expanded!
How to undo expand in Illustrator
You can undo expand by using the undo function Edit>Undo (ctrl+z or cmd+z). However, you will have to undo all the steps/effects you made since you expanded the object. If you expanded too far back, beyond your “undo history” limit you can’t reverse the expansion.
The best thing to do is to avoid being in this situation in the first place. Copy your object into a hidden layer or save it as a separate document before you choose to expand it. This way, you can always have it in its unexpanded state.
Difference between “expand” and “expand appearance” in Illustrator
Expand allows you to turn text, patterns, lines and shape strokes into vector shapes with outlines. Expand appearance only applies to brush strokes objects with appearance effects like transparency. They achieve the same result of outlining objects and “fixing” effects permanently. When expand isn’t available, expand appearance will be and vice-versa. You don’t have to worry about choosing between the two.
Fixed: expand appearance in Illustrator not working
If expand appearance is greyed out, then you are trying to expand an object that the function cannot apply to. Expand Appearance is available when you’ve selected a brush stroke, or shape with appearance attributes like transparency.
If you are trying to expand text, patterns, lines, etc, then “Expand” should be available, which works the same way. Make sure you’ve selected (V) the object first before trying to expand it. Also, confirm that your layer is not locked.
If you’ve selected the object and both Expand Appearance and Expand are greyed out, or you are not achieving the results you wanted, your software may be having a bug. Some Illustrator users have experienced this with the 2019 update. Try saving your progress and relaunching your Illustrator program. If this does not work, report the issue to Adobe Illustrator Feedback.
How to expand text in Illustrator
To expand text in Adobe Illustrator:
- Select the text using the selection tool (v).
- Go to Object>Expand…
- Make sure “object” and “fill” boxes are checked. Click ok.
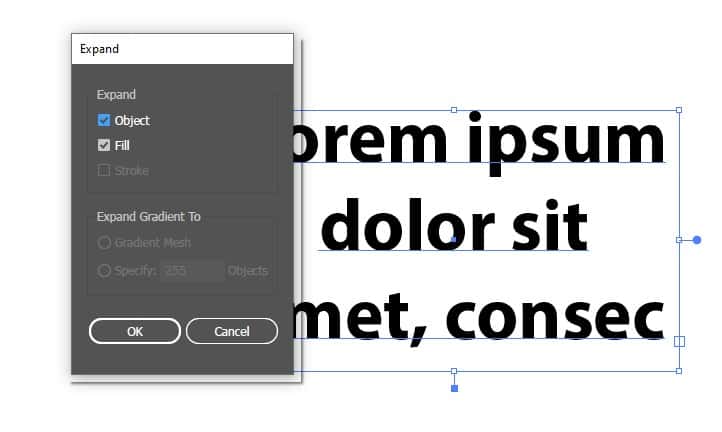
Your text is expanded! To work with the individual letter shapes, go to Object>Ungroup or double click on the shape to enter isolation mode. If you wish to turn the text object/vector into a pixel-based image, see how to rasterize text in Illustrator.
How to expand a gradient in Illustrator
To expand a gradient in illustrator:
- Select your shape containing the gradient using the selection tool (v).
- Go to Object> Expand…
- In the expand options, specify the number of objects your gradient will “break” into. When you expand a gradient, it breaks into multiple banded shapes creating the illusion of a gradient. The more objects the smoother the gradient.
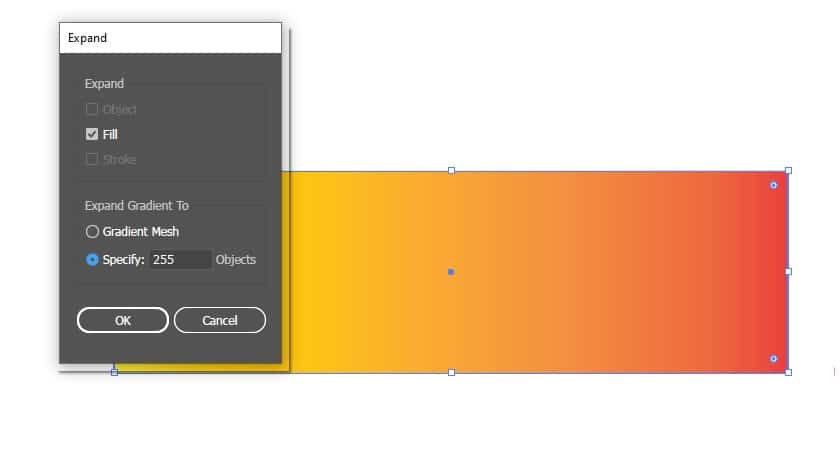
Note: You don’t have to expand gradients in Illustrator to save and share the file or as a measure to retain resolution. In fact, expanding the gradient just makes the object less appealing because it creates the banded effect that will likely be noticeable when the shape is enlarged.
If instead you want to create a mesh gradient you can warp using anchor points, and add colors:
- Select your shape containing the gradient using the selection tool (v).
- Go to Object>Expand…
- In the options, click Expand Gradient to “Gradient Mesh”.
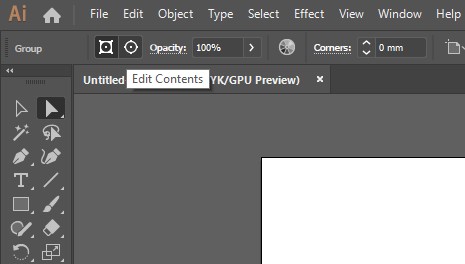
- To edit the gradient and add colors to points, switch to “Edit Contents” at the top left of your interface.
How to convert a stroke to a shape in Illustrator
- Select the stroke using the selection tool (v)
- Go to Object>path>Outline Stroke.
- Alternatively, go to Object>Expand Appearance.
Both “Expand Appearance” and “outline stroke” commands convert brush strokes to shapes with outlines and fill. The centre path of the brush stroke won’t be there anymore and changes to the stroke settings will now apply to the outline only rather than the entire object as it did before expansion.
Final word
Before expanding, remember to save your object or text in a hidden layer or separate document in case you may need to reverse the changes or share editable text, strokes, or patterns. Expanding is permanent and cannot be undone after you save the document.
Is Graphic Design a Dying Career?
Thanks for the read! If you have any questions or feedback feel free to reach me via the contact form on my About page or on my twitter page.

3 thoughts on “What Does Expand Do In Illustrator? ANSWERED!”
Comments are closed.