To make a print in Photoshop, without the white margin showing on your paper, you have to activate the borderless setting in Photoshop and have the correct configuration on your printer’s settings.
Some printers do not allow borderless printing, while some restrict it on certain templates like “Envelope” printing E.g The Canon PRO-1000 only allows borderless printing in A4, A3, A3+, A2, Letter, 4″ x 6″, 5″ x 7″, 8″ x 10″, 10″ x 12″, 14″ x 17″, 17″ x 22″ while the Epson Rx700series allows only 4″ x 6″, 5″ x 7″, 8″ x 10″, or letter-size (8.5″ x 11″). Check your printer’s manual under “Roll Media Handling” to see if it allows edge-to-edge printing.
Here’s a step-by-step guide to setting up borderless printing in Photoshop:
Method 1:
Borderless printing on a PC
In certain situations, like printing borderless on an envelope, you may not be able to set up a bleed to trim the paper down to size manually when printing. To print borderless without a bleed:
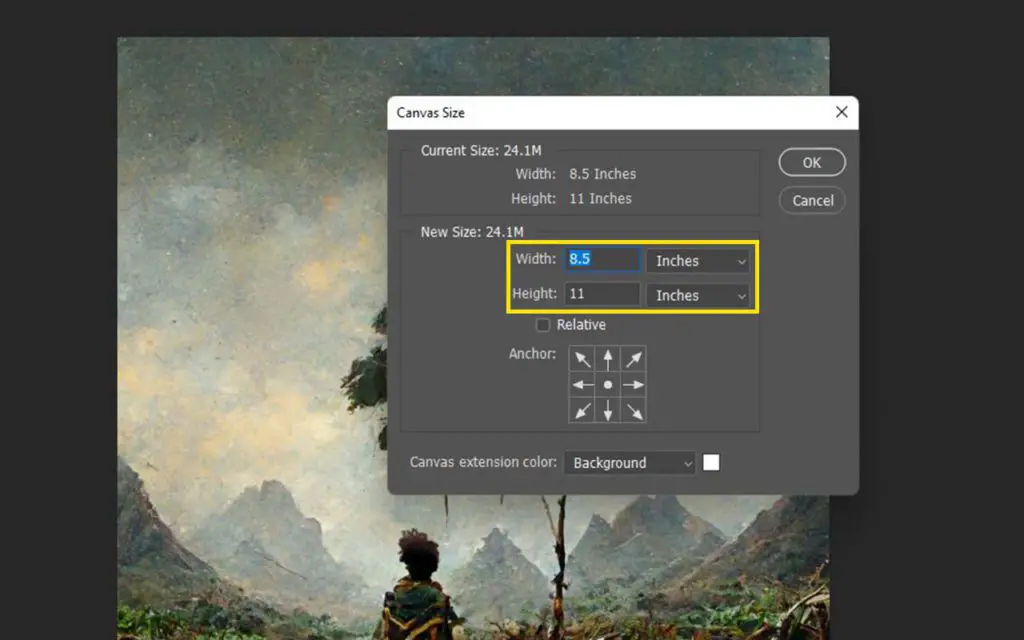
On Photoshop make sure you have the right size canvas and paper in the correct orientation (landscape or portrait) To do this, go to Image>Canvas size. In the dialog box, confirm your image size. In this example, I’m working with 8.5×11 inches (letter).
Open the printer settings in Photoshop by clicking Ctrl+P on Windows or Cmd+P on a mac. You can also go to File>Print
Scroll down to “scaled print size”. “Scale to fit media” should be unchecked.
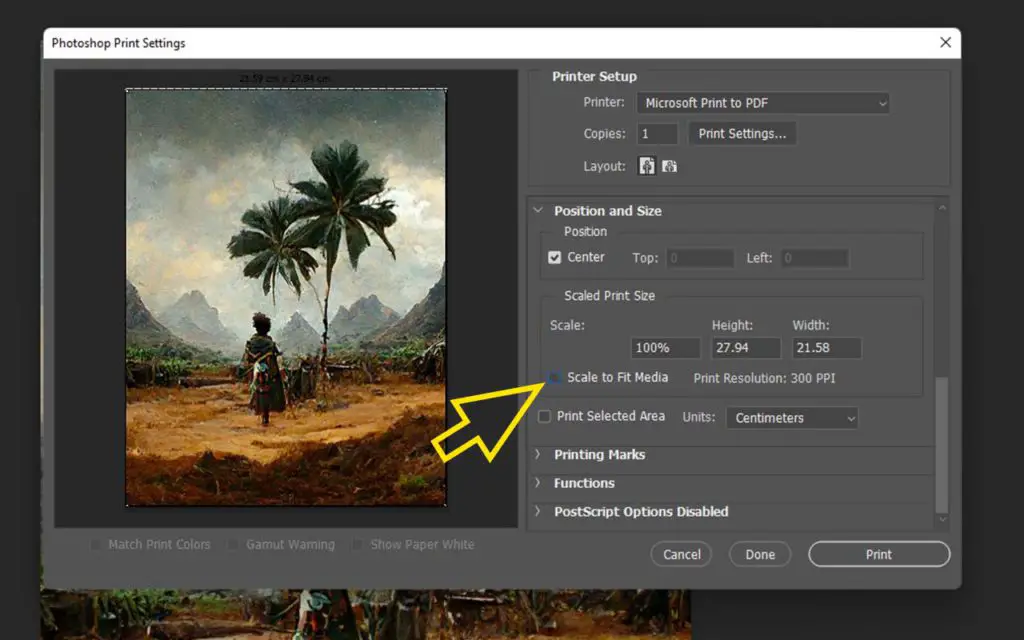
Under functions, click “border’ and make sure it’s zero. Bleed should also be zero.
Now go to Print settings to open your printer’s driver. Depending on your printer, these settings may be different.
In the main menu, select standard print or Photo print( higher quality but uses more ink and risk of smudging). Enter your paper size to match that of Photoshop and the paper you will feed into the printer.
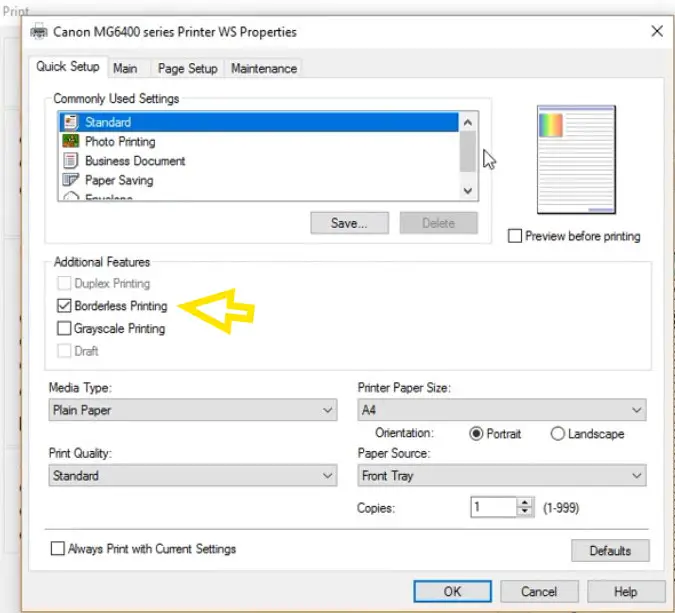
Orientation should also match that in Photoshop (landscape or portrait).
Your paper source should be “Manual feed”. Select “Borderless printing” under additional features. Choose plain paper if prompted.
Click ok to save the settings.
Feed your paper into your printer. Then go back to Photoshop, File>Print, and select Print.
If the printer is still leaving a slight white border, go back to the Printer’s settings, click Expansion, and set to Max. Save your settings then try printing again.
If you’ve done everything right and your printer allows borderless printing, your artwork should be printed edge to edge.
If this hasn’t worked, your other option is to print slightly larger with a bleed. Continue to method 2.
Method 2:
In this method, your paper should be larger than your artwork/canvas size. In this case, I’ll use 10×12 inch paper to print my 8.5×11 inch image. If your artwork is A4 size you can feed an A3 into your printer.
First, you will add a bleed to your artwork.
Extend your photo or artwork slightly outside the edges of your canvas by selecting all layers and transforming using Ctrl+T or Cmd+T on mac, and drag with the shift button. Note, you will cutout this bleeded area so all important graphics should be within the margin of the canvas.
Click Ctrl+P on PC or Cmd+P on mac to open the print dialog.
Scroll down to Functions and select bleed and type in 0.5 inches.
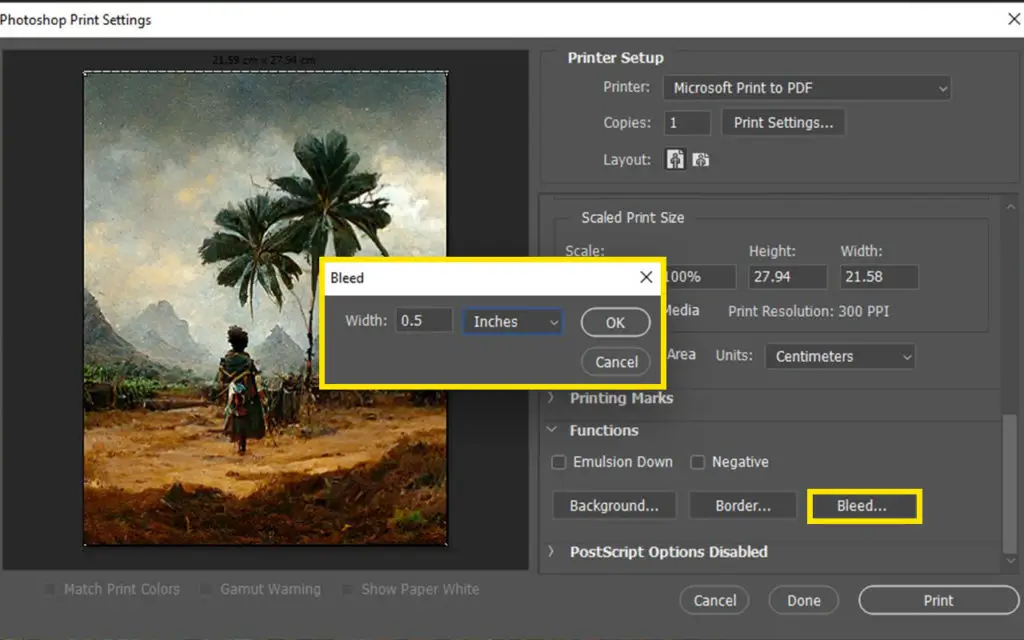
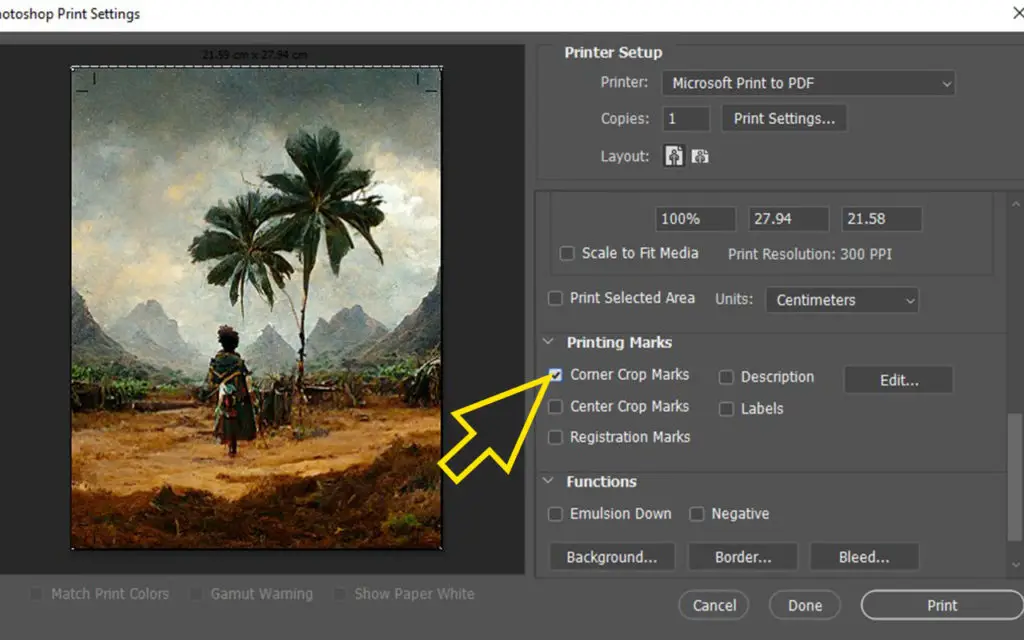
Check the “corner crop marks” box under “Printing marks”.
Then click Print Settings and set your paper size under “user-defined” to the actual size of the paper you’ll use.
Uncheck any “borderless” setting and under Expansion set it to “Retain size”.
Then proceed to print your image.
After printing, cut out the bleed as guided by your crop marks using a blade and steel ruler. You can also use a die-cutter if you have one.
In summary
When it comes to printing your photos or designs, there’s one important aspect to consider: the printer’s borderless capabilities. Almost all printers come with non-printing margins, also known as gripper space, for the rollers that feed the paper through the machine. However, some printers have the added feature of borderless printing. This varies by printer model and cannot be changed.
To check if your printer can print borderless, find the manual for your printer. Look under the section labeled “role media handling” and you’ll see a column labeled “border free print widths.” This will show you all the widths of materials that can be printed borderless.
If your printer doesn’t have borderless printing capabilities, don’t worry. You can still achieve a borderless look by setting up your document to bleed. This means extending the printable portion of your document or image to go about 1/8 inch beyond the edges of the paper. Keep in mind that anything of importance that must be printed in whole should be at least 1/8 inch from the edge to prevent it from being cut off due to paper misfeeding or movement during the printing process.
When printing, be sure to use paper that is larger than your image size, including the bleed. Once the printing is complete, simply trim off the bleed manually for a clean, borderless look.
In conclusion, understanding your printer’s borderless capabilities is crucial for achieving the desired look for your photos or designs. By following the steps outlined above, you’ll be able to achieve a borderless look, even if your printer doesn’t have that feature built-in. Happy printing!