Do you need to prepare an image to put in a video or a photograph for print? Or maybe you just want to crop out certain parts of a picture. Changing the aspect ratio is not as straightforward as you’d expect in Photoshop.
There are a few methods, that allow you to do so without warping and stretching your image. In this article, you’ll learn step by step how to change the aspect ratio of an image using three different methods, the crop tool method, the marquee tool method, and the image size method.
Crop tool method
Step 1: Open your Photo
Open your photo in Photoshop by going to File> Open… and selecting it from it’s location on your PC.
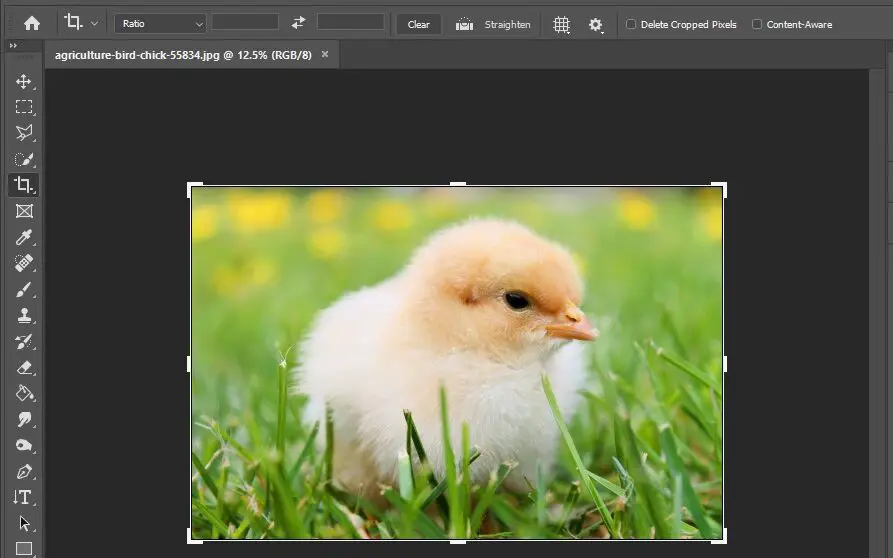
Step 2: Select the crop tool
Select the crop tool or use the keyboard shortcut “C”. The crop handles and outline will appear around the image.
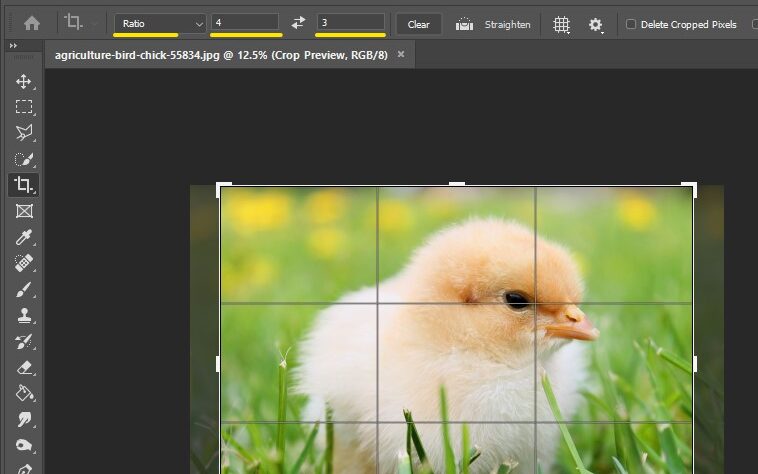
Step 3: Define the aspect ratio
In the options bar at the top with Ratio selected, type your desired aspect ratio like 4:3. That is, 4 in the width field and 3 in the height field.
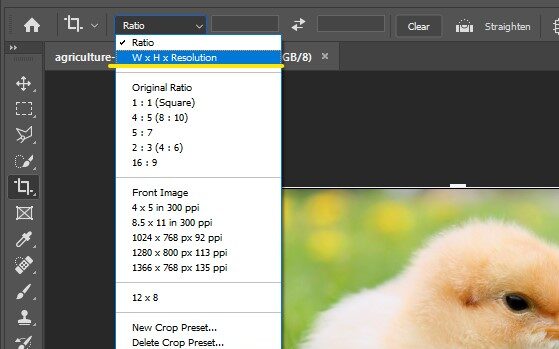
Step 4: Set dimensions and resolution
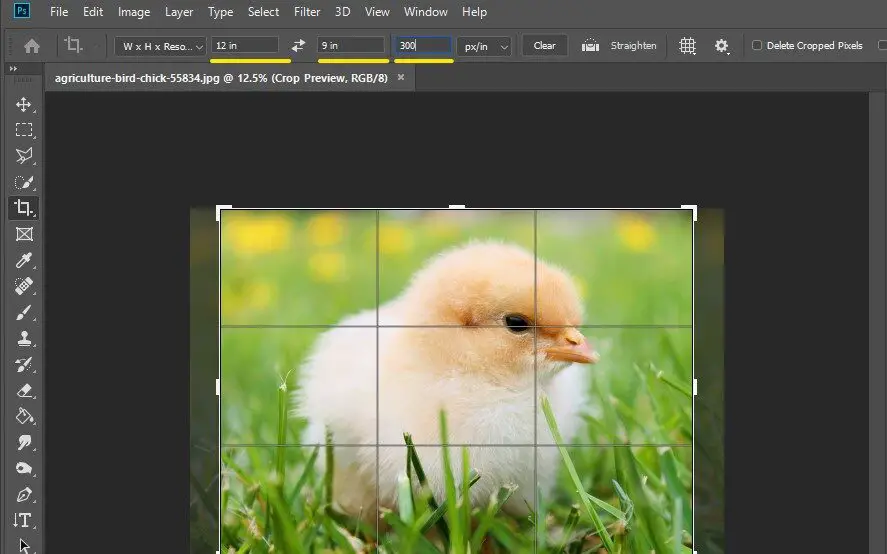
If you would like to add actual dimensions like 12in by 9in, click the “Ratio” field and in the drop-down select “W x H x Resolution” as shown. Type in your width in the first field, your height in the second field and resolution. The width and height will likely default to inches (In). You can change it to centimeters if you’d like by typing “cm” after the digit. Type the resolution as 300 px/in if your image is intended for print or 72 px/in for screens or sharing online.
Step 5: Transform the crop area
You can click and drag the image and the crop area will remain the same size and aspect ratio. If you want to permanently delete parts of your image, you can check “delete cropped pixels”. Otherwise, leave it unchecked and photoshop will hide pixels that fall outside your canvas size and you can reveal them again with the transform tools.
Step 6: Confirm your crop
Press Enter or the checkmark once your done filling your aspect ratio and resolution. If you want to undo your crop, use Ctrl+z or Cmd+z on your keyboard. To redo the crop, just select the crop tool again and click on the image. Your last aspect ratio and resolution will still be the default but you can change it as per your needs. Activate your rulers to see your image dimensions as you work.
Step 7: Save the aspect ratio as a preset
You can save your new aspect ratio as a preset by selecting the ratio drop-down and clicking “New Crop Preset…” Name your preset and click ok.
To change your aspect ratio from landscape to portrait, you can click the flip icon and it switches your width and height inputs. To remove your aspect ratio and switch back to freeform cropping, just click “clear” and it erases your field inputs.
Now you know how to change your aspect ratio using the crop tool.
Rectangular Marquee tool method
Step 1
Load your image onto Photoshop
Step 2
Select the rectangular Marquee tool or press M on your keyboard.
Step 3
In the Options bar at the top, click Style and a dropdown menu will appear. Choose Fixed Ratio to add ratio inputs or Fixed Size if you need to input the exact final dimensions. Type in the necessary fields.
Step 4
With Fixed Ratio, click and drag until you cover the area you want to crop to. The selection will maintain your ratio as you drag. If you chose Fixed size, just click once on your image.
Step 5
In the Menu bar, go to Image > Crop to crop your selection. The pixels outside your crop area will be deleted.
Step 6
Save your image. And that’s how you crop with the Marquee tool. Notice in this method, you may not be able to revert to your original image as you would with the crop tool method.
Canvas size method
Step 1
Using your aspect ratio, calculate the final dimensions you want your image to be. For instance, if using an aspect ratio of 4:3, and your width is 12 inches, your height will be 12 x ¾ = 9 Inches.
Step 2
Now that you have your width and height, go to Image> Image size… Deactivate the Link icon, otherwise, photoshop will try to preserve the original aspect ratio when you input one field. Input your respective width and height.
Remember your resolution should be 300 ppi for print or 72 ppi for screen and web use. The resample check box keeps your image quality from degrading if you are expanding to larger dimensions. Click ok. You’ll get a warning if your new image size cuts off parts of the previous dimensions. Proceed if you are ok with this. Your image will be cropped and outside pixels will be deleted.
If you wish to undo the change, press Ctrl+z or Cmd+z on your keyboard.
This canvas size method like the marquee tool one is destructive since it deletes the excluded pixels.
Faqs
What is aspect ratio
An aspect ratio is the ratio for your image width to your image height. If your image dimensions are 12 In by 8 In, your aspect ratio is 12/8 simplified to 3:2. It may also be represented as a decimal, 1.5 since 12 divide by 8 is 1.5. An image that’s 40 cm by 20 cm has an aspect ratio of 2:1 or 2.
If the aspect ratio is greater than 1, the image is in landscape since the width is greater than the height. If the aspect ratio is less than 1, the image is in portrait mode, for instance a 10 inch by 20 Inch image is 1:2 or 0.5. If the aspect ratio is 1, the image is square, meaning it has equal width and height dimensions.
Standard aspect ratios
Standard aspect ratios form photography are 1:1, 4:3, 5:4, 5:3, 3:2 and 16:9
The standard aspect ratio for High definition videos is 16:9.
Computer and tablet screens commonly have an aspect ratio of 16:10
Mobile phones generally have a vertical format with aspect ratio of 9:16
Find out more on aspect ratios on adobe help.
Conclusion
From the three methods above, you can choose the best one that suits you. The crop tool method allows you to move around your crop area to choose the best fit before cropping. The marquee tool does the same but it is hard to undo. The image size method is quick and easy but doesn’t allow you to choose a specific area, although you can transform your image later. Thanks for reading, subscribe to our mailing list and be the first to get new reviews, tips and freebies.