Adobe Photoshop allows you to flip or change the direction of your text on your canvas.
To flip a single letter in Photoshop:
- you need to separate the letter you want to flip from the rest of the text.
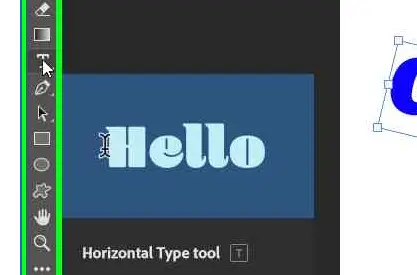
- Create a new text layer by clicking T to select the text tool and click on the canvas to type the letter.
- Next, click on the Move Tool to escape the text editor.
- Access the free transform tool by clicking on Edit > Free Transform or Ctrl/Cmd + T.
- Right, click on the letter and select Flip Horizontal or Flip Vertical in the drop-down menu.

The Death of Photoshop: Why Adobe is Losing?
How to rotate text in Photoshop
To rotate text in Photoshop:
- Click on T to select the Text Tool, click anywhere on the canvas, and type your text.
- Select your preferred font style and size
- With your text layer selected, click on V or go to Edit > Free Transform.
- Grab your move tool from the toolbar by clicking on V to exit the text editor
- Then, click Edit > Free Transform or Ctrl/Cmd + T to choose the free transform tool
- Now, hover your cursor over any corner of your text transform control box until you see the rotate icon a double-sided U-shaped arrow.

- Click and drag your mouse to rotate the text to your desired angle. You can input your rotation angle by specifying values in the options bar.
- Click on the Commit Transform tick at the top-right menu or hit Enter on your keyboard to confirm accept the transformation.
How to edit text in Photoshop
To edit text in Photoshop:
- Create a new document and type your text. If you already have the text, then open your document with the text you wish to edit.
- Select the Type Tool from the toolbar and highlight the text you want to edit.
- To change the text color, click on the Color Picker icon in the options bar and move the color slider to choose your color.
- Click Okay to confirm the color you have chosen.
- To edit text on a type layer, select the Layer in the Layers panel and select the Horizontal or Vertical Type tool in the Tools panel. Access the settings in the options bar, and change the font or color.
- When you are done editing, click the checkmark in the options bar to complete editing.
If you can’t edit your text in Photoshop, check if your Layer is locked. To unlock the Layer, click on Windows > Layers and the lock icon in the text layer. You will now be able to edit the text in that Layer.
How to move text in Photoshop
To move text in Photoshop:
- Open the image that contains the text layer which you want to move.
- Select the text layer from the layers panel. In case the layers panel is invisible, press the F7 key on your keyboard
- Now click on V to select the Move Tool. Click on the text and drag it to where you like. Alternatively, you can use arrow keys on your keyboard for more precise movements the exact movement than using your mouse. But it would help if you were sure to click on the text and not open the spaces between the letters.
How to outline text in Photoshop
One of the great ways to make text stand out in Photoshop is by outlining it. With the right combination of form, weight, font, and line, you can create your desired effect.
Here are the steps on how to outline text in the Photoshop:
- To begin with, select the Type tool and type in your text.
- Right-click on the Type Layer, and from the menu, select the Blending Options. Alternatively, you can go to Layer > Layer Style > Stroke.
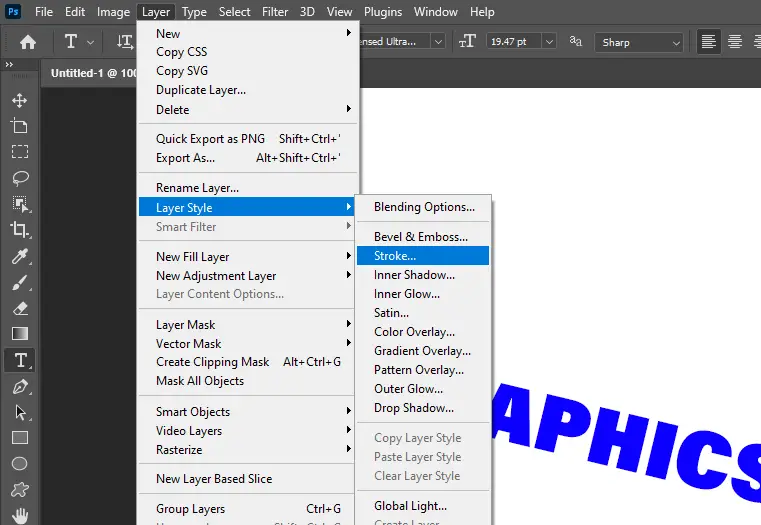
- Select Stroke under the list of styles on the left. Note that the options under Stroke will give you control of how you want the text to appear on the text border. Now set the width or size to your desired line weight by entering your value manually or using the slider.
- Choose a Position for the Stroke. There are three options you can choose: Inside, Center, and Outside. The right position will alter the appearance of the text when combined with some other layer elements.
- Use the Blend Mode to control how the colored Stroke will interact with layers underneath the Stroke, as this will impact the final outlook when you do something, for example, placing over a colorful image.
- You can fill the Photoshop strokes with colorful gradients and solid colors. If you want to choose a solid color, click on the color tile to open the Color Picker. You can select the hue you like and click OK.
How to fill text with a gradient in Photoshop
You can fill a text with a gradient by using the Gradient tool. The distance between where you first press the mouse button and where you release the mouse button impacts the appearance of the gradient the same way gradient type does. Here are the steps to apply a gradient to the text:
- Select the text that you want to fill in.
- Then, choose Layer > Simplify Layer to convert the text vector text to a bitmap image.
- Use Ctrl/Cmd + click on the thumbnail for the text layer in the layers panel to select the text.
- Select the Gradient tool.
- Click the desired gradient type in the options.
- Select your gradient fill from the Gradient Picker or create your own by clicking the left and right colors on the slider.
- Finally, position the pointer on the text where you intend to set the starting point of the gradient, then drag to the endpoint.
Conclusion
There are several ways to add and manipulate text in Photoshop. With Photoshop, you can edit text by flipping, rotating, moving, filling with gradient, outlining, filling with gradient and many more effects. Photoshop has Horizontal and Vertical Type text tools which you can use to create a single line text or a paragraph. Photoshop automatically creates individual Type layers when you create texts. Therefore, you have the flexibility to edit text without interfering with the rest of the design.
Interested in Web Design? Check out How Photoshop is Used in Web Designing